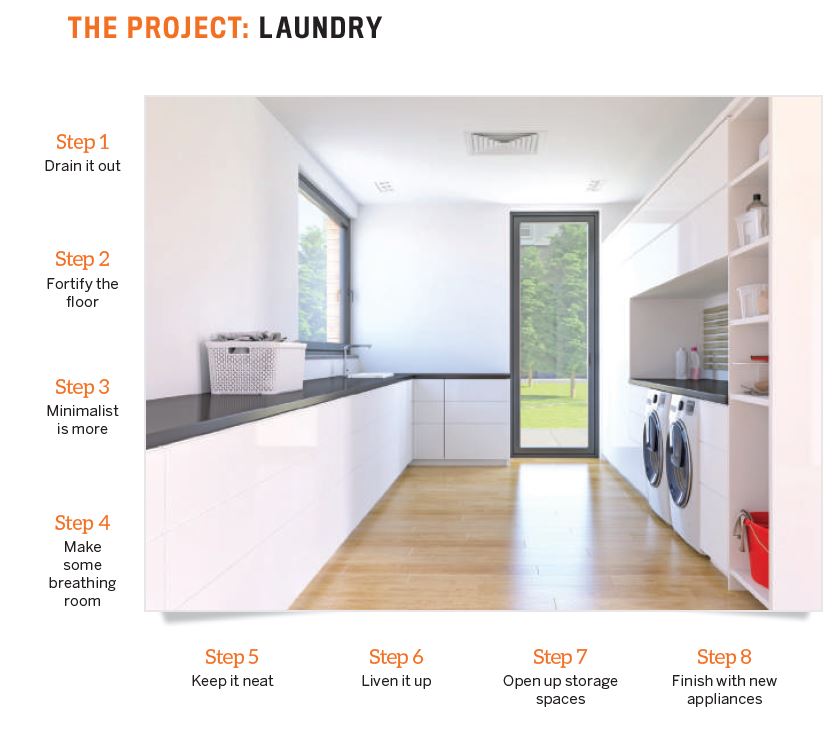
The laundry isn’t generally a must-see feature of a home; during an open home, people don’t clamour to see it the way they do with a kitchen or bathroom. The laundry doesn’t immediately spring to mind as a ‘wow factor’ room, and in fact it’s often tucked away in the back and given very little attention.

However, the laundry can be more than just the place where you wash your clothes. You don’t have to spend a pretty penny to create a beautiful space here; a cosmetic uplift can give this oft-neglected room some shine and make it a place where you’ll actually enjoy doing a chore. From an aesthetic perspective, giving careful consideration to the laundry during a renovation helps you create a smooth flow from room to room.
To begin, it’s important to pinpoint the crucial parts of the laundry room, according to veteran renovator Julie Anglesey, who, on the following pages, shares a laundry renovation she achieved at a cost of only $1,000.
“Every laundry needs a deep sink that you can do hand-washing in, and there needs to be space for your wash basket so that it’s nice and neat – you don’t want your laundry to be messy,” she says.
“Definitely make room for a washing machine and, if possible, room for a dryer. Because of the washing machine and dryer, a laundry needs ventilation. Storage is always good, too, as people like to keep their cleaning products in the laundry.”
STEP ONE: DRAIN IT OUT
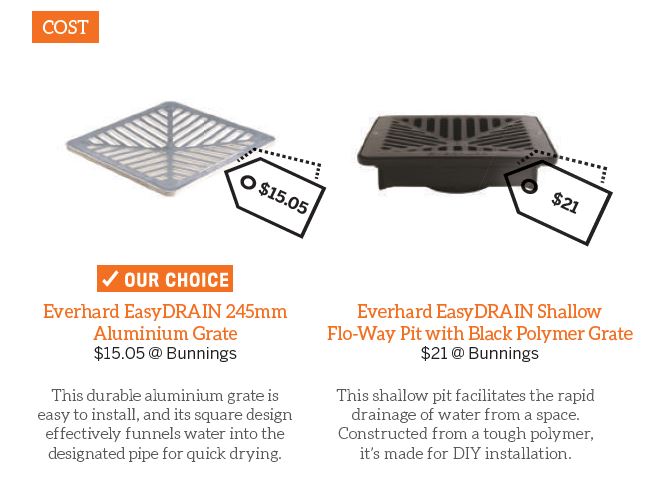
As a part of the house that will often see a lot of water-based action, it’s important to ensure that there are drain holes that can effectively get all that wetness out of the way in short order to limit damage to the flooring.
“Make sure that the fall of floor is such that the water will flow into the drain and not onto the floorboards,” Anglesey advises.
Additionally, you need to ensure that the rest of the room’s design doesn’t block the drain holes; position cabinetry and appliances well away from them.
You don’t have to spend a pretty penny … a cosmetic uplift can give this often-neglected room some shine and make it a place where you’ll actually enjoy doing a chore
TOP TIP
Drains require regular maintenance so they don’t get stopped up and overfl ow or generate odour. Scrub the drain with an old toothbrush and pour boiling water down it to clear any residue.
STEP TWO: FORTIFY THE FLOOR
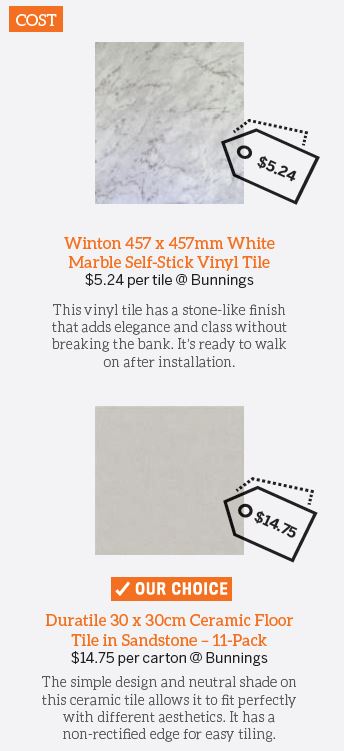
Tiles are one of the best options out there, as they tick all these boxes and are decorative too. Ceramic tiles with natural finishes are quite resistant to scratches and water; while vinyl tiles are highly versatile, easy to replace and perfect for those on a budget.
TOP TIP:
Because you’re working in a space with drains, it’s a good idea to get a tiler on the job to ensure that the tiles are installed to facilitate water flowing easily into the drain.
STEP THREE: MINIMALIST IS MORE
The laundry room is more functional than aesthetic, so it’s best to go with a clean, simple design – keeping things basic gives the room the illusion of space it needs. Light-coloured walls refl ect light well, making the laundry feel bigger, brighter and more welcoming. They also make the room easier to maintain, since you can spot dirt or discoloration right away.
“A white colour scheme keeps it neutral, so it will appeal to more buyers,” Anglesey says.
You might also consider other neutral shades, such as taupe, which is known for being soothing.
TOP TIP
.JPG)
For health concerns and for easy cleanup, always use a paint that’s resistant to moisture and mould for a laundry room. Some paint brands make it clear whether a paint is suitable for moist environments..
STEP FOUR: MAKE SOME BREATHING ROOM
Many laundry rooms don’t have windows, but because ventilation is such a vital part of a laundry, one of the best ways to meet that requirement is to install a window. Doing so will not only let more air into the room but also brings in natural light and adds to the illusion of space. The window can also be useful if you want to air-dry smaller articles of clothing in the summertime.

You don’t need too many windows for this room since it’s not a massive space – one or two wellplaced panes can be adequate.
TOP TIP
Good window styles for laundry rooms include casement and double-hung windows. Wide, unblocked panes are great for keeping the room from becoming stuffy, and double glazing helps save energy through excellent insulation.
STEP FIVE: KEEP IT NEAT

A collection of hampers and wash baskets will help to make your laundry more organised and can serve as additional storage space. They can even be decorative, coming in a variety of colours. Some wash baskets can be folded to make additional room as necessary.
TOP TIP
Stackable or foldable hampers and baskets are excellent, especially for small laundry rooms, because you can adjust the space to whatever you need at any given time. Narrow-bottomed hampers also don’t take up much space.
STEP SIX: LIVEN IT UP
Function might trump aesthetics in a laundry room, but there’s no reason for the space to be lifeless. A touch of green can be just the thing to break the monotony and add literal life.
“I always like to make sure there’s some greenery so that the buyer feels an emotional connection – they can see themselves wanting to spend time in that room,” Anglesey says.
“Artificial plants are a good choice, particularly if you’re a busy person and you don’t want to look after the plants but you like the look of greenery.”
(1).jpg)
TOP TIP
Philodendrons are suited for cool climates and rooms with less sun. Other living plants that could work in a laundry are devil’s ivy and maidenhair fern, both of which are good at surviving in the dark.

STEP SEVEN: OPEN UP STORAGE SPACES
Having a lot of storage is vital for a COST laundry, and it often means sacrificing space in order to have enough cabinets and cupboards. However, with a few changes, you can extend the purpose of storage areas.
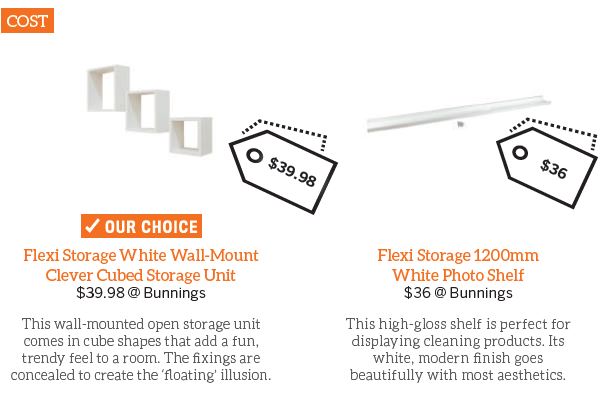
For instance, one good-sized cabinet under the sink might be adequate, along with a linen cupboard. Open shelves can be installed in place of additional cupboards.
“It’s nice to have shelving rather than overhead cupboards so that you can display lovely powder tins for individual character, as well as put your plants on the shelves,” Anglesey suggests.
TOP TIP
Given the humid environment of a laundry, make sure you give storage spaces room to breathe to keep odours from building up. Consider open shelving, or if you have a cabinet, keep the doors open once in a while.
STEP EIGHT: FINISH WITH NEW APPLIANCES
Nothing brings down a freshly COST redecorated room more than outof- date appliances. A new washing machine is a wonderful finishing touch and a great investment in the long run.
Depending on the amount of space you have to work with, it’s good to have a dryer as well, especially if there isn’t space to air-dry in the laundry. It also enhances the functionality of the room. Combination washer/dryer machines are ideal if you have limited room, and there are various brands out there so it’s worth hunting for a good deal.

TOP TIP
Washer/dryer combos are a sound choice financially and in terms of convenience. However, you should also take into consideration the cons of a combo appliance – it takes a long time to dry your clothes and also uses more water. Also, if it breaks, you’re out two appliances rather than one.
CASE STUDY
.jpg)
Affordability came with a challenge, as Julie Anglesey saw when she entered the laundry room of the cottage she had purchased jointly with a client.
“The original condition was very bad; there was some timber shelving in there that was very makeshift. The concrete floor was in really bad shape, too, as it was all pitted and had holes through it,” she says.
The property had been purchased for just $130,000, and Anglesey had a limited budget to work with, so she had to determine where she could save on costs. The budget also meant adjusting expectations to whatever was available. The floor in particular posed a problem for Anglesey, forcing her to revise her original plans.
“There were raised concrete plinths on the floor on the other side of the old sink that possibly would have had an old boiler there back in the ’50s or ’60s. We had to rip that out – we couldn’t just lift the tiles and lay another floor on top of it,” she says.
Anglesey removed the old sink and the plinths. She also laid more screed on top of the concrete in order to level the floor, and topped it with sandstone tiles she had got on sale.
.jpg)
“Originally, I was going to either paint the concrete or put vinyl on the floor. But I decided to go with tiles because it would finish off the room much better,” she says. She also discovered that the room was missing a drain hole, so she had to have one installed.
“We made sure that there was a drain hole away from the walls in case people wanted to put more cupboards in there, so they wouldn’t block the drain,” she says.

The laundry renovation had a big impact because it made sure that every room in the house was new. To finish it off with a new laundry made sense and helped make sure the house pulled a very good price when it was listed on the market for sale,” she says.
Source: Your Investment Property 28th August 2019 https://www.yourinvestmentpropertymag.com.au/property-renovation/reno-focus-laundry-265800.aspx
